1. Introduction to MusicFab
In an era when streaming services are everywhere, there are still cases when music consumers need to enjoy their favorite music and songs in a completely offline environment. The all-new MusicFab aims to offer music fans a comprehensive solution to download online music.
MusicFab now has Windows and Mac versions. The PC version currently includes 11 streaming downloader modules designed for the leading premium streaming services. Others will be supported soon.
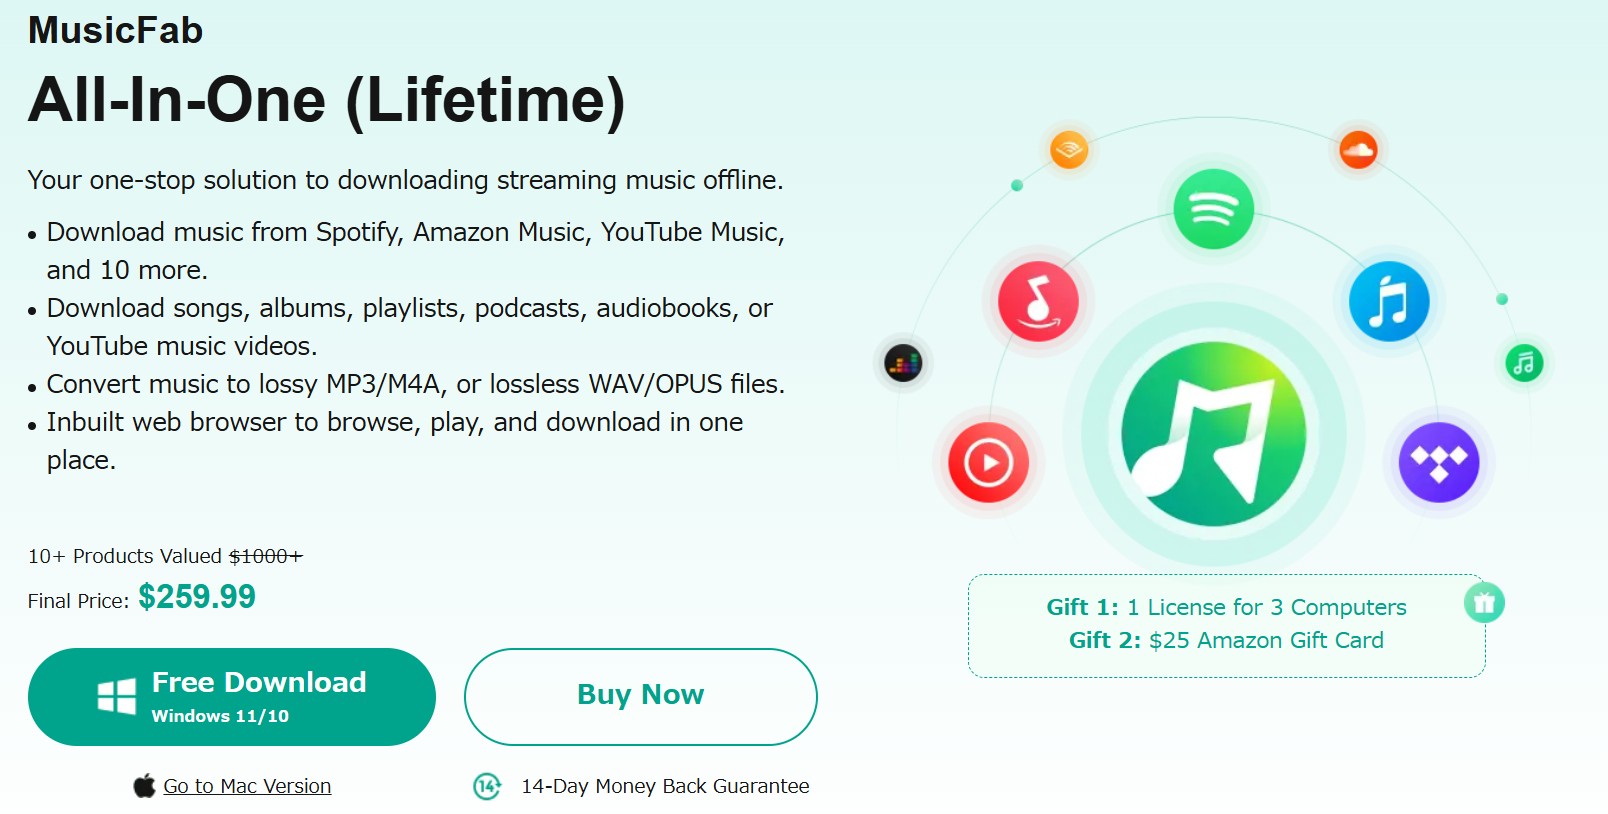
These modules are now available as an All-In-One bundle, in addition to being available for separate purchase. By installing the Windows and Mac versions on your computer, all of the modules will be installed at once.
Features at a glance:
- Supports Multiple Audio Formats — MusicFab can convert streaming music to MP3, M4A, WAV, FLAC, and OPUS formats.
- Fastest Downloading Speed — MusicFab ensures the fastest music downloads, taking only 5-10 seconds to download a song.
- Lossless Original Audio Quality — MusicFab allows you to download songs in original audio quality without any loss of fidelity.
- Lyrics Support — MusicFab facilitates the download of both the music and the lyrics.
2. Download and Install MusicFab
2.1 Download MusicFab
To download and install MusicFab onto your computer, visit MusicFab's product page at https://musicfab.org, or the Download Center at https://musicfab.org/download.htm to download either the online installer program or the offline installer, and then manually perform the installation prompts to complete the installation procedures.
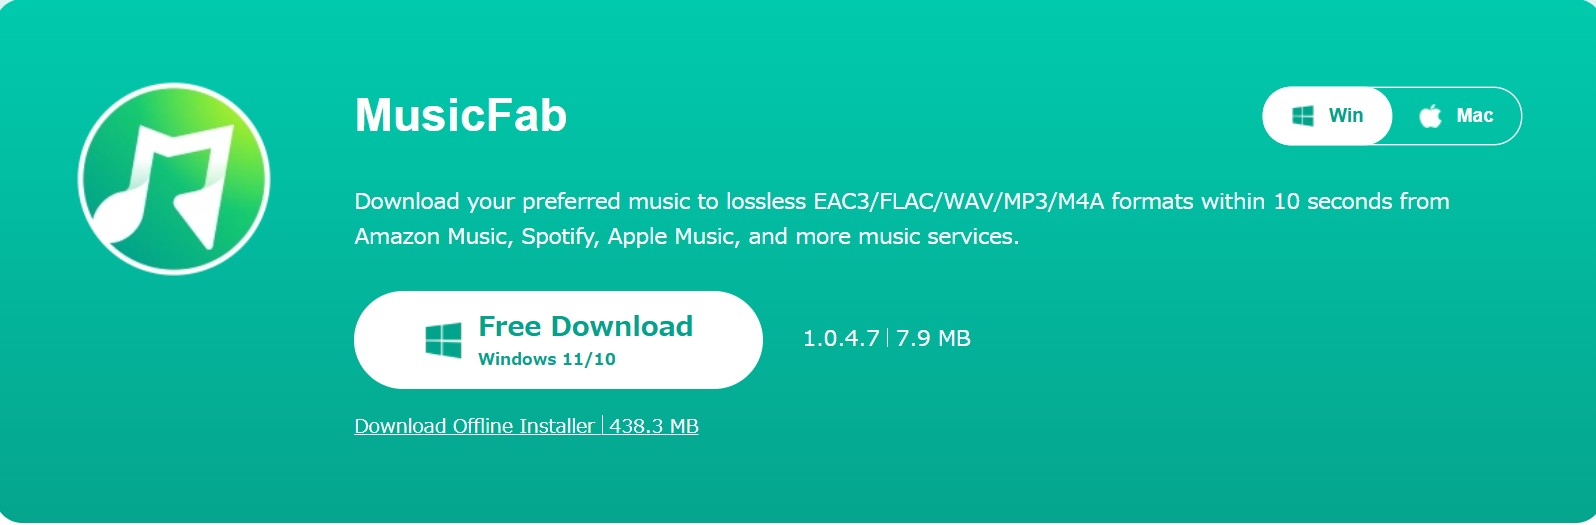
Note that both the download buttons at the Product Page and Download Center give you the Online Installer, which is a small setup, around only 7.6MB in this case, that downloads the remaining components after it is run. You need Internet access every time you want to install MusicFab this way. The advantage is that you can keep this Online Installer on your HDD, and it will always download the latest version.
However, if you prefer the Offline Installer, you need to click the “Download Offline Installer ” text link that shall download you the standalone installer for MusicFab. And when you run the offline installer, the installation will be done offline because the complete software is downloaded on the first download. So, there is no need for the Internet during the following installation procedures.
2.2 Install MusicFab
2.2.1 Via the Online Installer
- Step 1 — Download the Online Installer from any of the pages mentioned above;
- Step 2 — Double-click to run the Online Installer and "Click to Install";

- Step 3 — Give it a few seconds to gather the required download information;
- Step 4 — The Online Installer now starts to download the installation components;
- Step 5 — Required components downloaded, the installation process now starts. Wait as it proceeds.

- Step 6 — Installation procedures complete. You’re ready to rock!

2.2.2 Via the Offline Installer
- Step 1 — Download the Offline Installer from the Download Center;
- Step 2 — Double-click the Offline Installer and the installation procedures shall initiate immediately.

- Step 3 — Wait for the installation procedures to complete. And then you’re ready to rock!

3. Authorize/Deauthorize MusicFab
MusicFab uses the online verification method for authorization. To remind you: authorizing MusicFab requires a live internet connection, so check your Firewall or anti-virus software settings to make sure they do not block MusicFab from accessing the internet. Besides, before authorization, make sure you are already a member at MusicFab Member Center; otherwise, go Create an Account first.
- Step 1: Upon MusicFab startup, click the hamburger icon near the top right corner of the main interface, and then from the drop-down menu, click the “Authorize” tab to pop up the Authorization Window;

- Step 2: Enter your registered e-mail and password at MusicFab Member Center, and then click the "Authorize" button to proceed;

- Step 3: If the information you entered is correct, you shall see all the “This computer has been authorized successfully” window pops up next. Then you can dismiss the window by clicking the OK button.

- Step 4: In case you want to check the license information of the product module(s) you've purchased, click the "License Info" tab from the hamburger dropdown menu;


- Step 5: To deauthorize MusicFab on your current PC, click the "Deauthorize" tab from the hamburger dropdown menu;

- Step 6: Enter your password and then click the "Deauthorize" button to proceed. You can also deauthorize all your current PCs at the Member Center.

4. Update MusicFab
There are two basic ways to update MusicFab to the latest version, one is through the live update feature, and the other is to manually download the latest installer which is always available on the product page and Download Center of MusicFab official website.
4.1 Old-Fashioned Update
For users preferring an old-fashioned way of making an update, simply visit the Downloader's product page at https://musicfab.org/, or the Download Center at https://musicfab.org/download.htm to download either the installer program or the offline installer, and then manually perform the installation prompts to complete the installation procedures.
4.2 Live Update
Live update can only be realized from inside the program itself, which means only users already installed MusicFab can use this method to keep their installed versions up-to-date. To do that, follow the steps below:
- Step 1: Click the hamburger icon near the top right corner of Main Interface, and then from the drop-down menu click Check for Update;

- Step 2: Once a newer version is detected, click the Update Now button to download the update package;

- Step 3: Wait for the download to complete;

- Step 4: After the download finishes, exit MusicFab and proceed to install the updates;

- Step 5: Wait as the update package is being installed;
- Step 6: When the update package is successfully installed, you are ready to use the newest version.

Note that, due to network reasons, the Live Update might occasionally fail to detect the new version. When this occurs, users can also use the traditional way to make the update.
If there is no update available, you will see the following window.

5. Hamburger Dropdown Menu
The Hamburger Dropdown Menu is at the top right corner of the Main Interface.

- Settings: This tab opens the Settings panel.
- Authorize: This tab opens the Authorization panel where you can activate MusicFab on your computer.

- Deauthorize: This tab opens the Deauthorization panel where you can deactivate MusicFab on your computer.

- License Info: This tab opens the License Info panel where you check your license status for the downloader modules you’ve purchased.

- Member Center: This tab leads you to MusicFab Member Center, where you can upgrade/renew the license, check the products you have, etc.
- Online Help: This tab takes you to the FAQs page of MusicFab.
- Feedback: Click this tab if you encounter a problem or want to send us your feedback.

- Check for Update: Click this tab if you want to see if there is a new version available.


- What’s new: This tab directs you to check the changelog of the new version released.
- Open Log Folder: This tab directs you to the location where you can find the log files of MusicFab.

- About: This tab opens the window where you can find the version info, access our official website, etc.

6. Settings Panel
To open the Settings panel, click the Settings tab from the Hamburger Dropdown Menu mentioned above in Chapter 5.

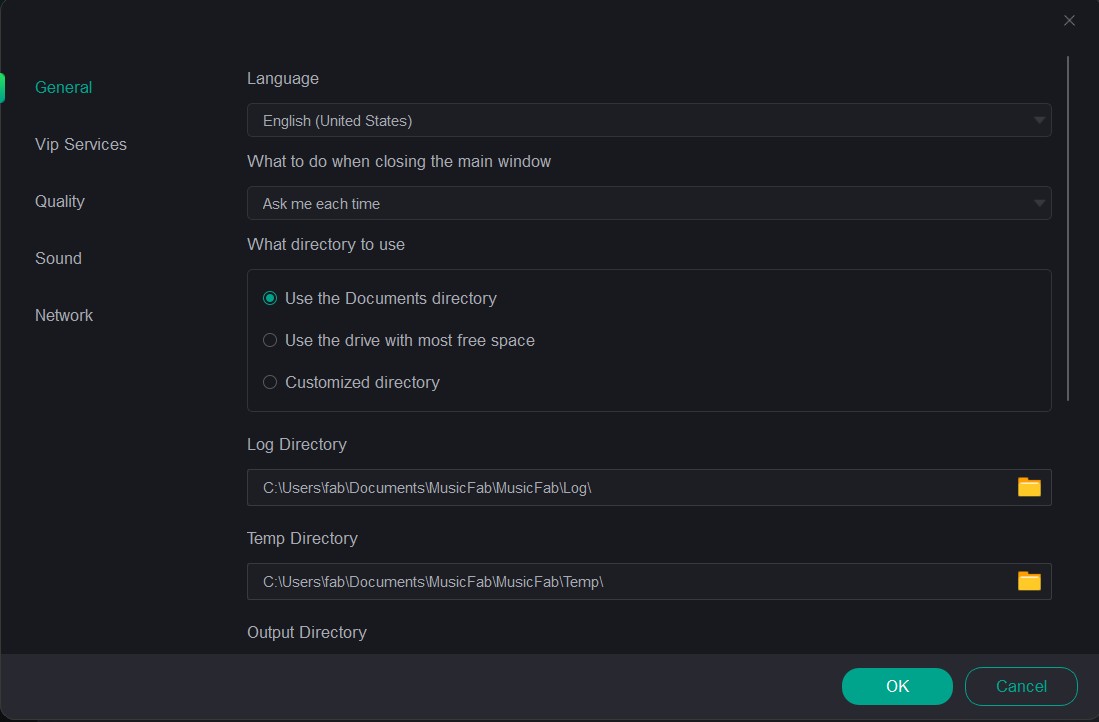
6.1 General
- Language: Select the UI display language you want here.
- What to do when closing the main window: Choose what you want to do when closing the main window. You have three options to go to. Ask me before existing or minimizing the program, Minimize to systray or Exit program.
- What Directory to use: Choose what you want about the directory. You have three options to choose from. Use documents directly, Use drive with most free space and Customized directory.
- Log Directory: The default path where the log files are stored on your computer hard disk drive.
- Temp Directory: The default path where all the temporary files are stored on your computer hard disk drive. You can change it anytime when necessary.
- Output Directory: The default path where all the downloaded audio files are stored on your computer hard disk drive. You can change it anytime when necessary.
- Create subfolder for each streaming website: You can choose to create a subfolder for each streaming website to save the downloaded audios.
- Auto-start upon system startup: Tick the checkbox if you want to automatically launch MusicFab each time after your computer is logged in.
- Open output directory when download finishes: If you do not want the audio file you just downloaded to open automatically, you may uncheck this option.
- Disable screensaver/standby/hibernation when downloading music: If you do not want your computer screensaver/standby/hibernation when downloading, you may check this option.
6.2 VIP Services
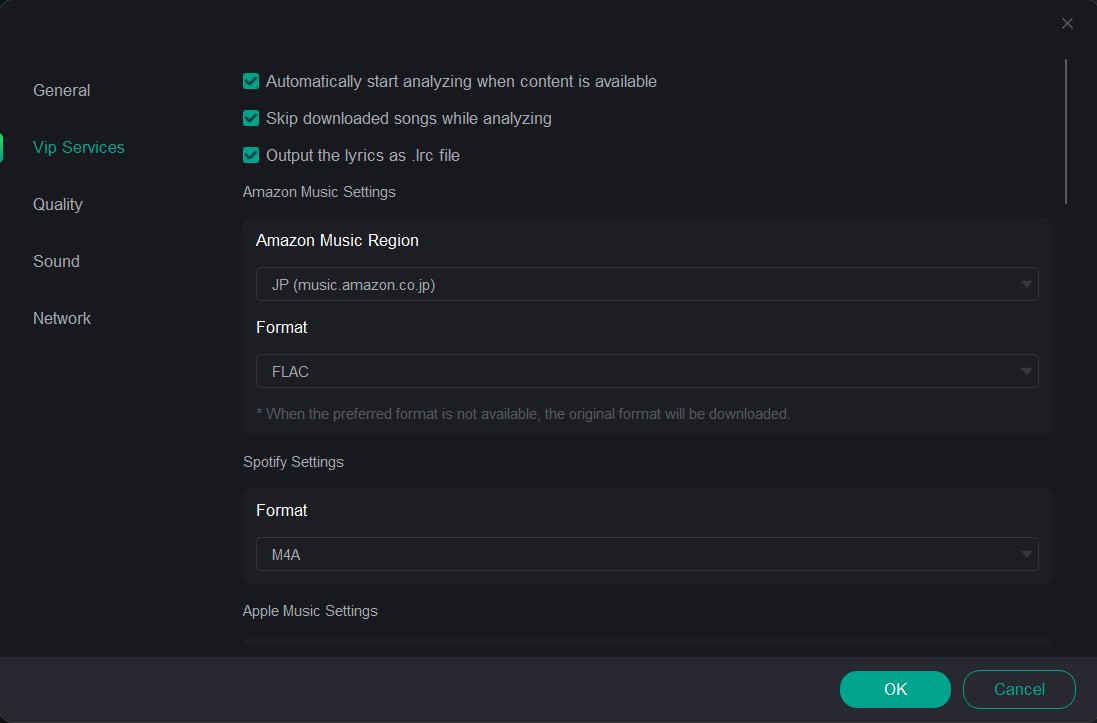
Settings under this page are related to paid streaming services. Currently there are two services supported. Amazon Music and Spotify.
- Amazon Music Settings
Amazon Music Region: Choose the regional website of Amazon Prime you are subscribed to.
Format: Choose the format you want to download from Amazon, like FLAC, EAC3, OPUS, Spatial Audio, MP3, M4A and WAV.
- Spotify Settings
Format: Choose the format you want to download from Spotify, like FLAC, OPUS, MP3, M4A and WAV.
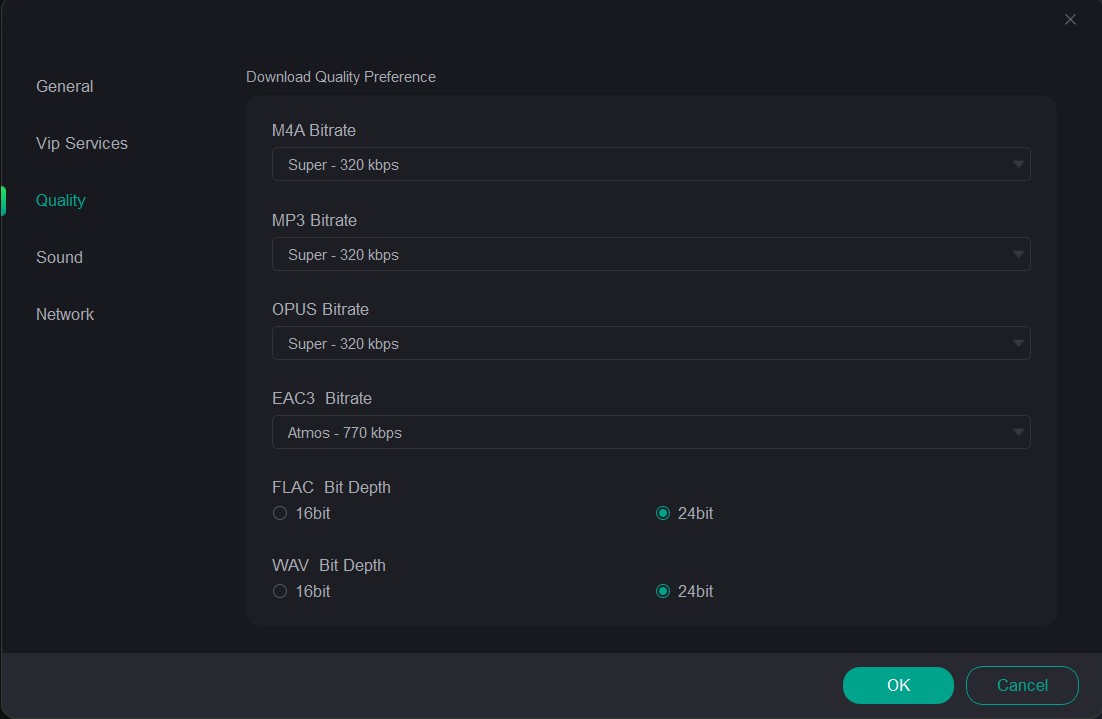
6.3 Quality
Preset the format and audio quality of the downloaded songs.
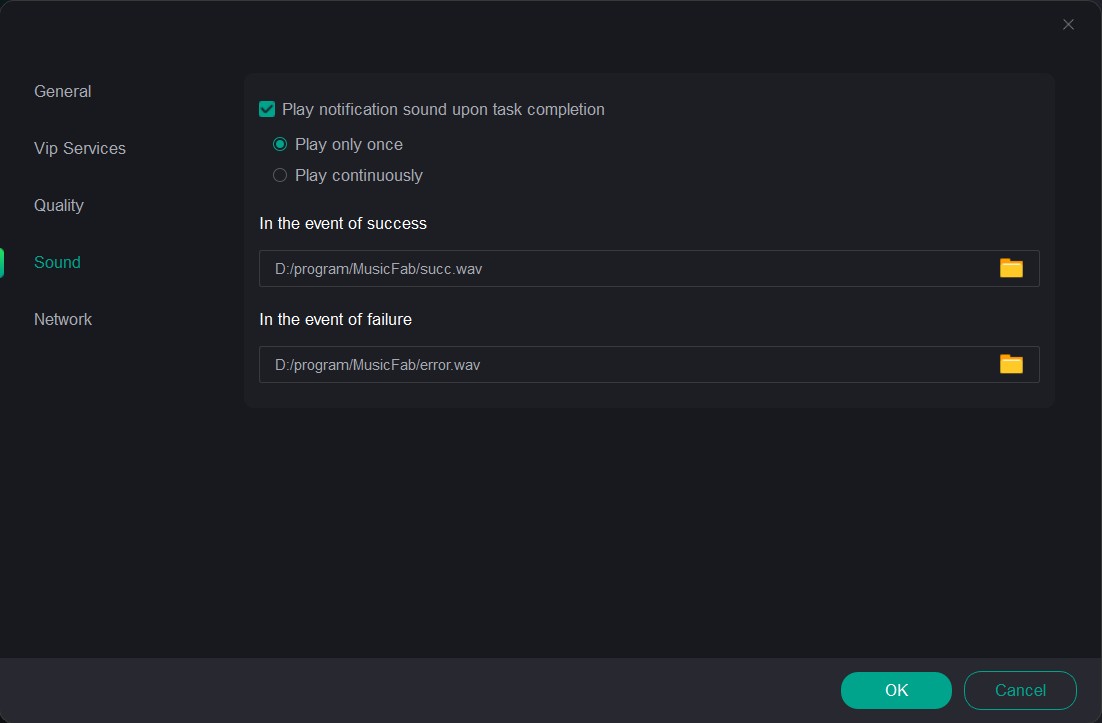
6.4 Sound
Choose your favorite notification sound when a download is successfully completed. You can make it play only once, or play continuously until you manually turn it off.
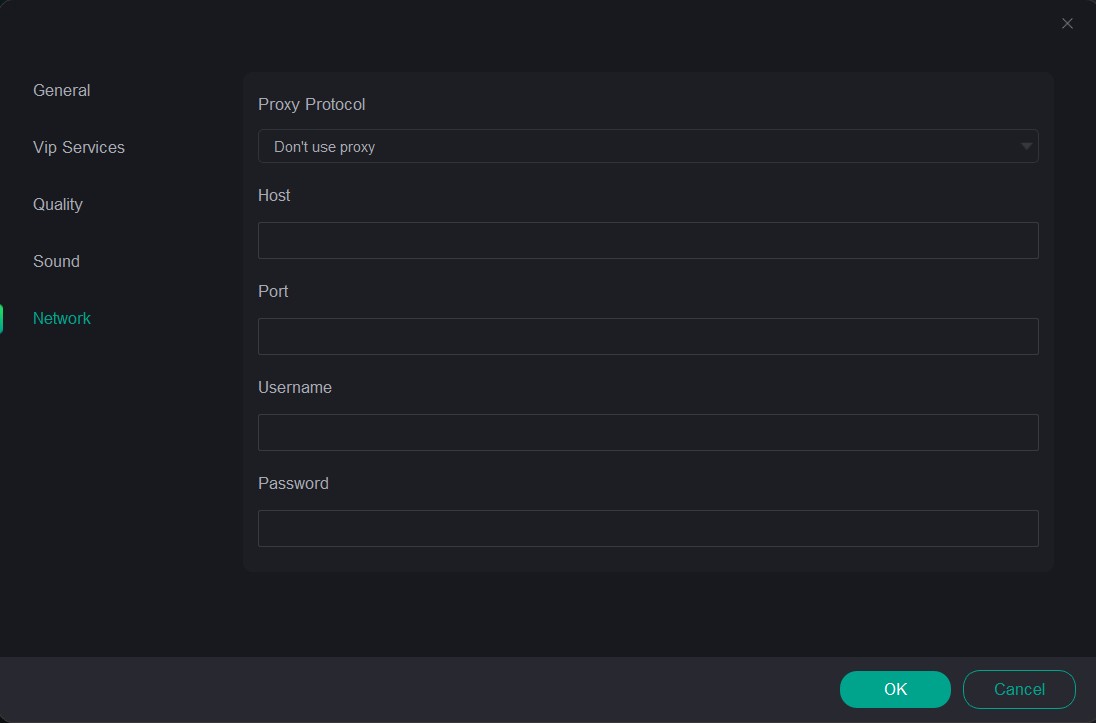
6.5 Network
This is the place you configure the network settings for MusicFab.
7. Main Interface
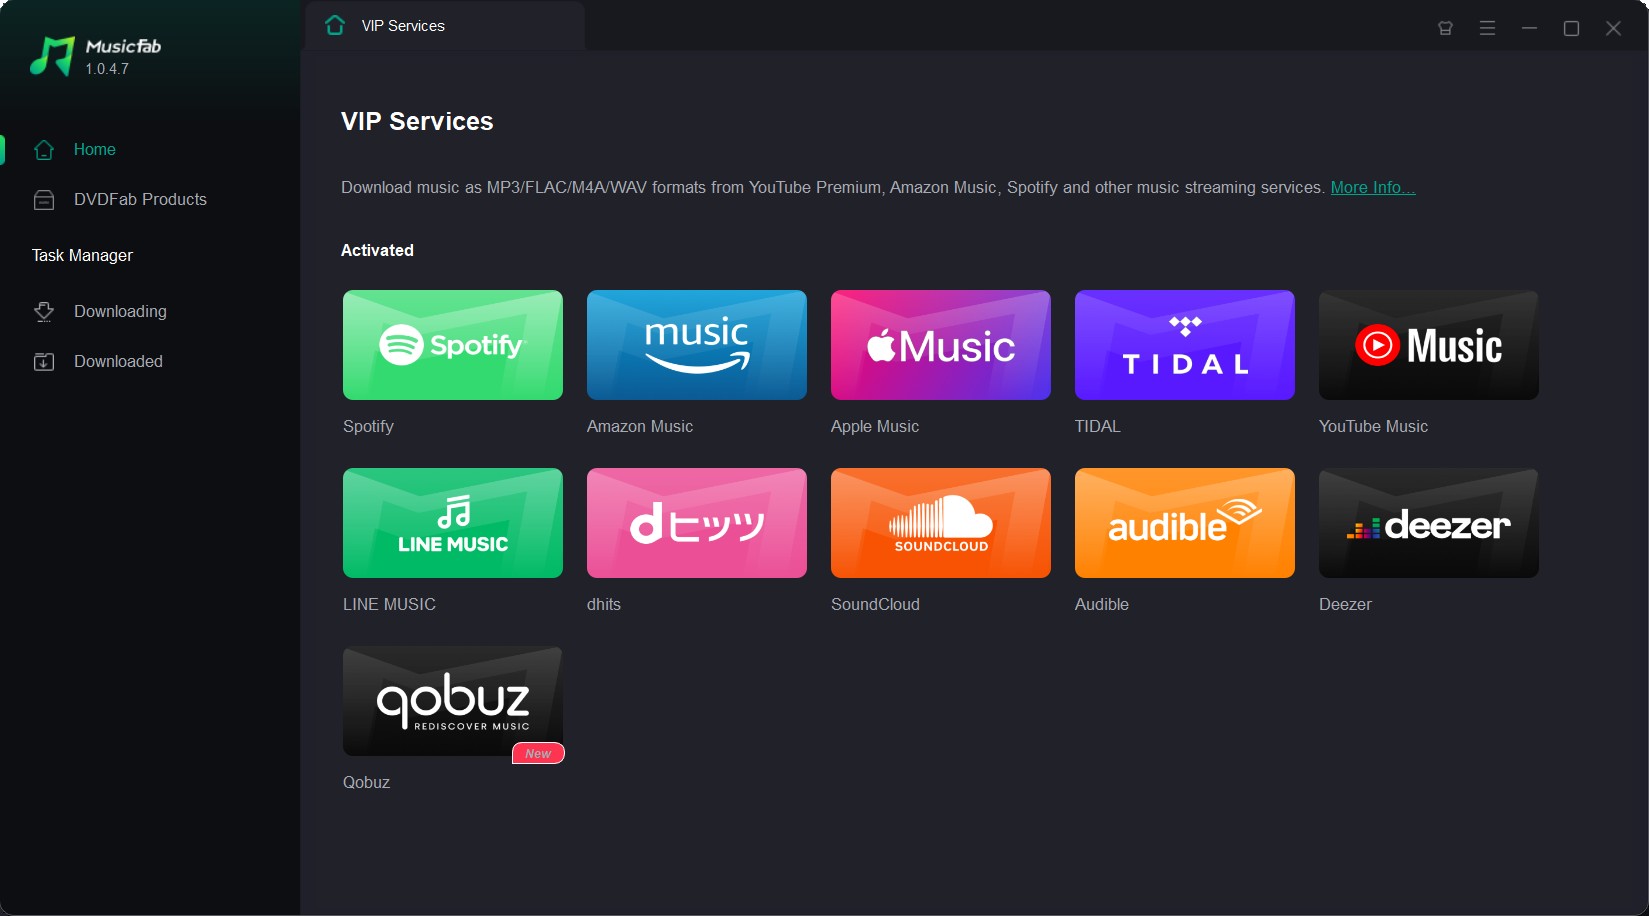
Upon launching MusicFab, you will be brought to the Main Interface, to be more specific, to the homepage of the inbuilt explorer section.
At the left Navigation Pane, you can jump from VIP Services, Task Manager including Downloading and Downloaded tabs.
- VIP Services: This is the place you should go if you want to download paid streaming songs from Amazon music, Spotify or others.
Task Manager includes:
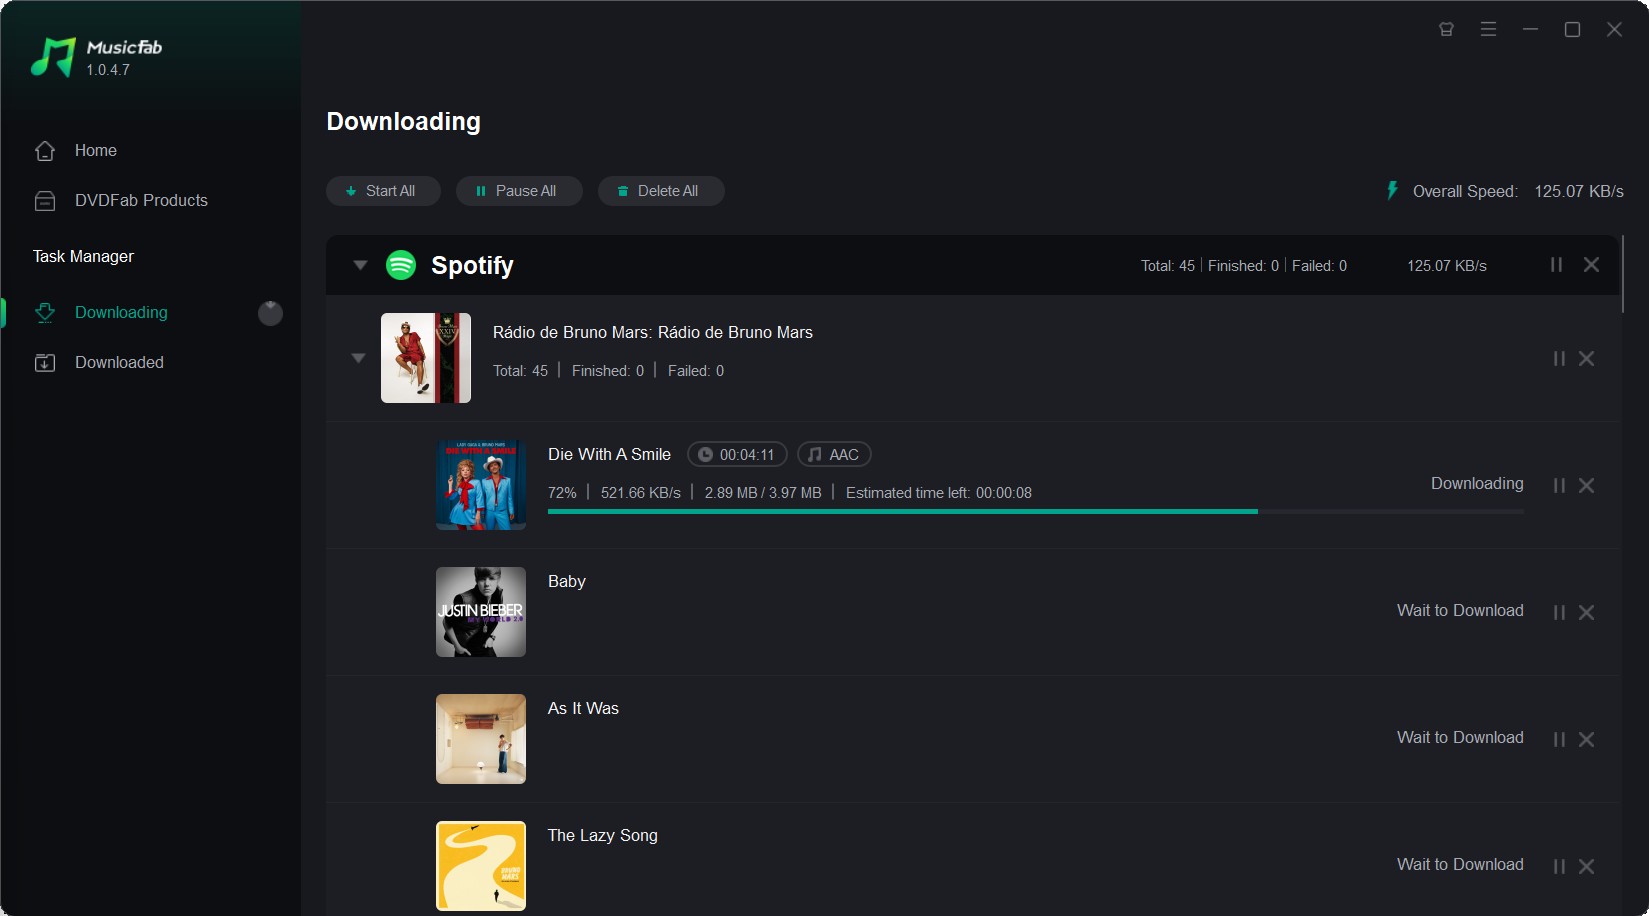
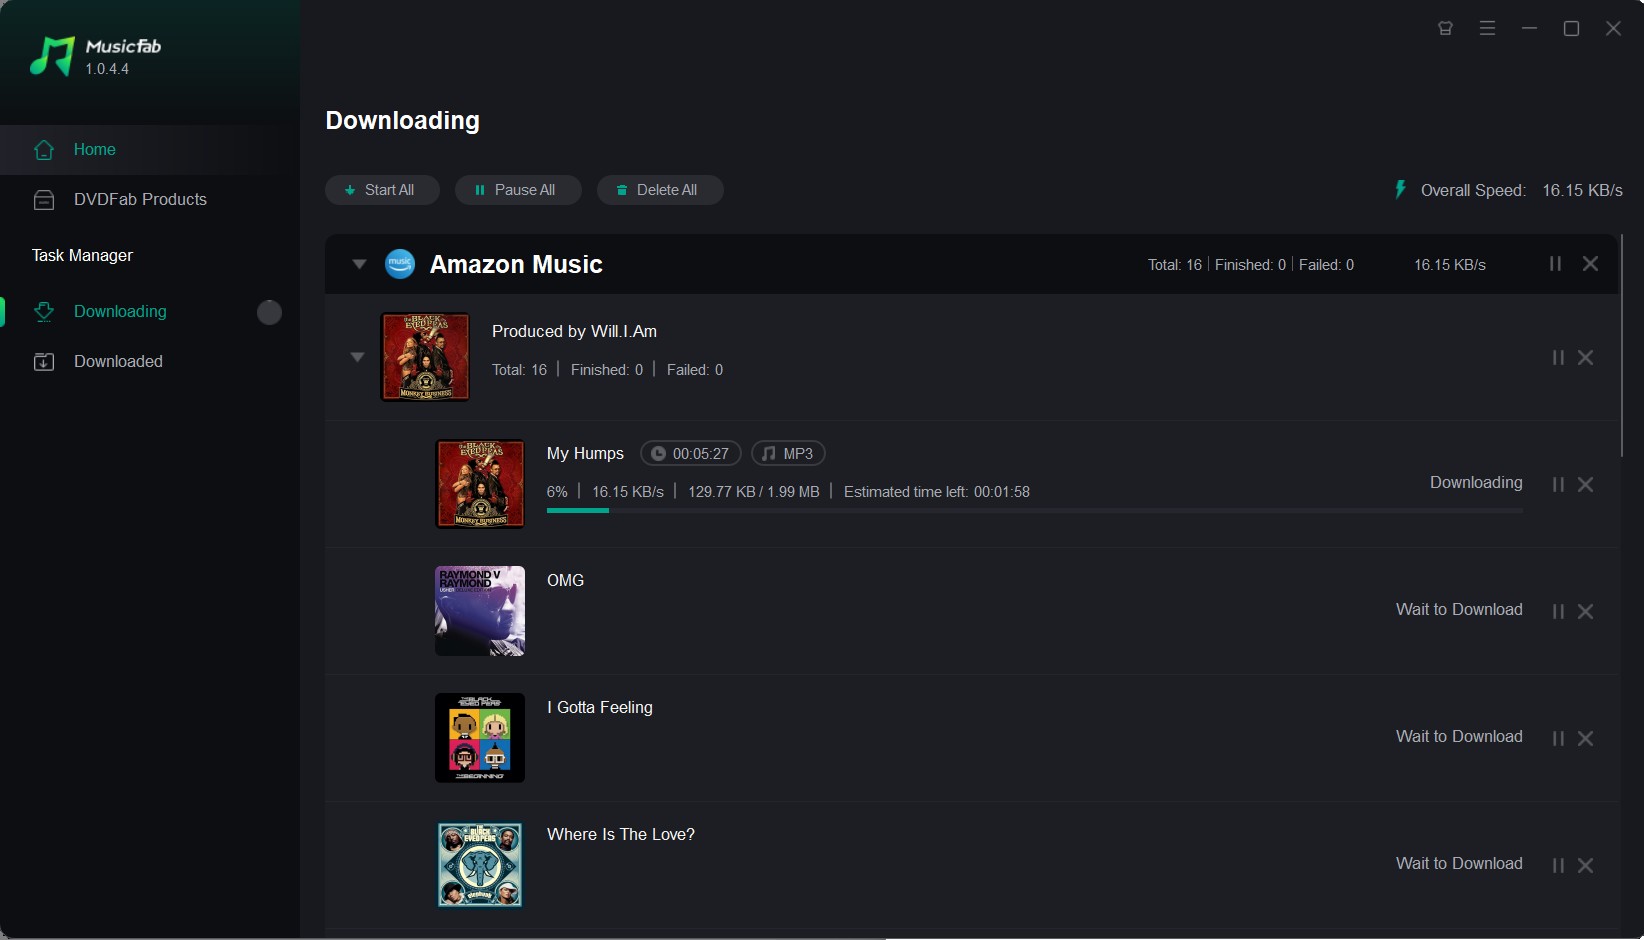
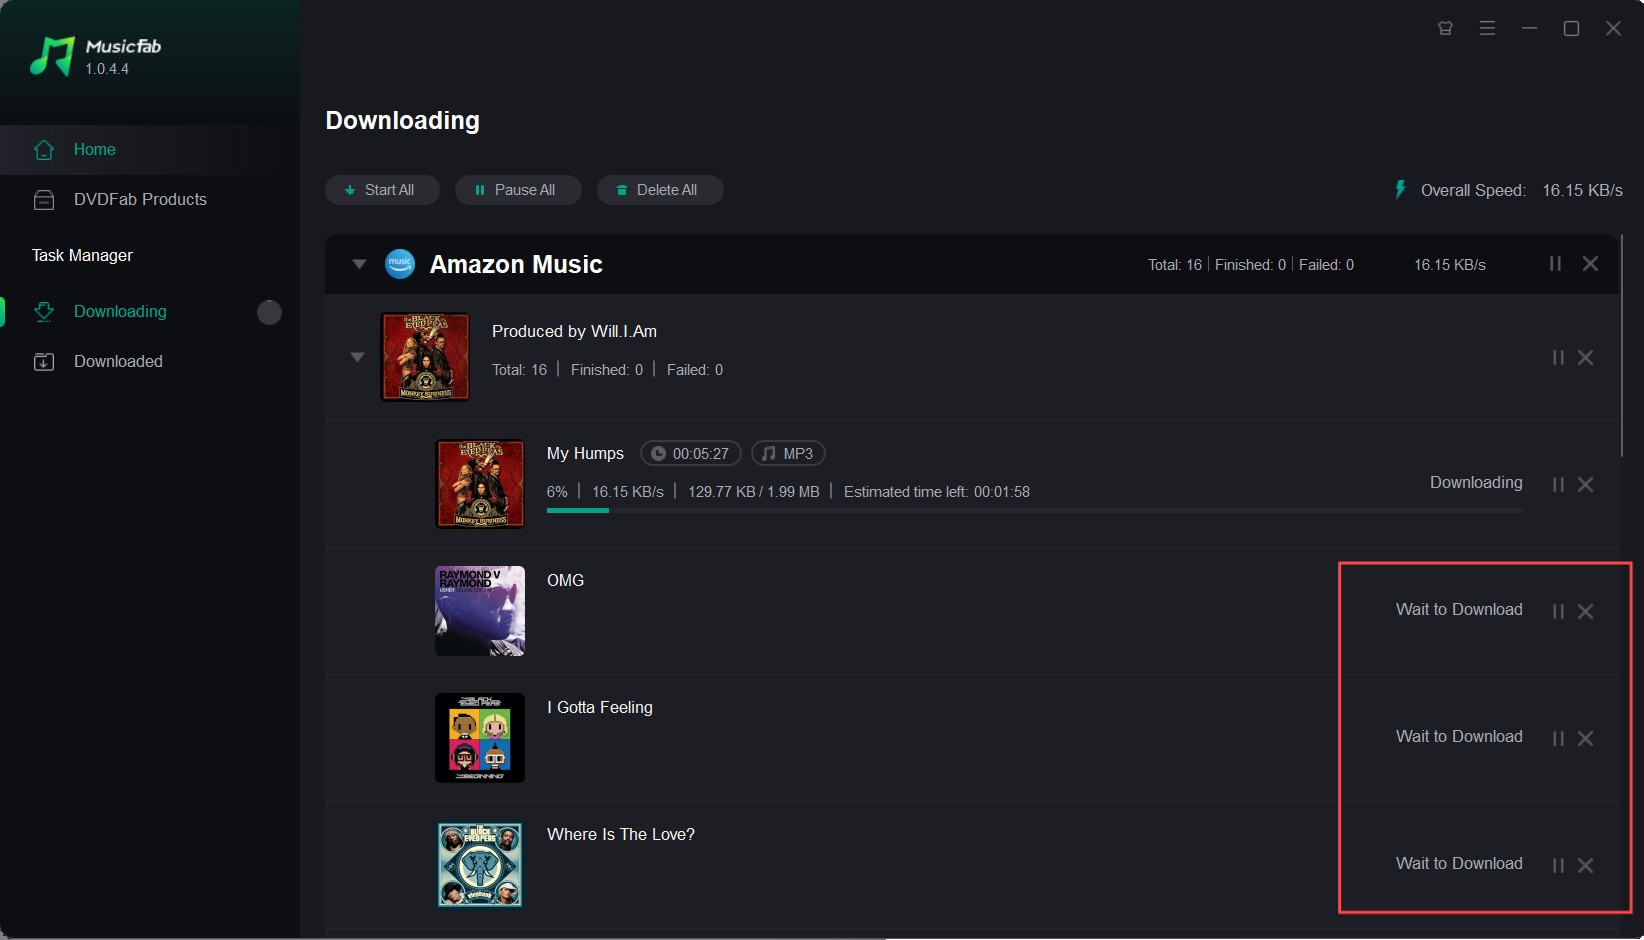
- Downloading: All your current downloading tasks will be listed here. You can come back and check the real-time download status anytime you want. You have the options to Pause All and Start All (Resume) downloads, or Delete All of them, too.
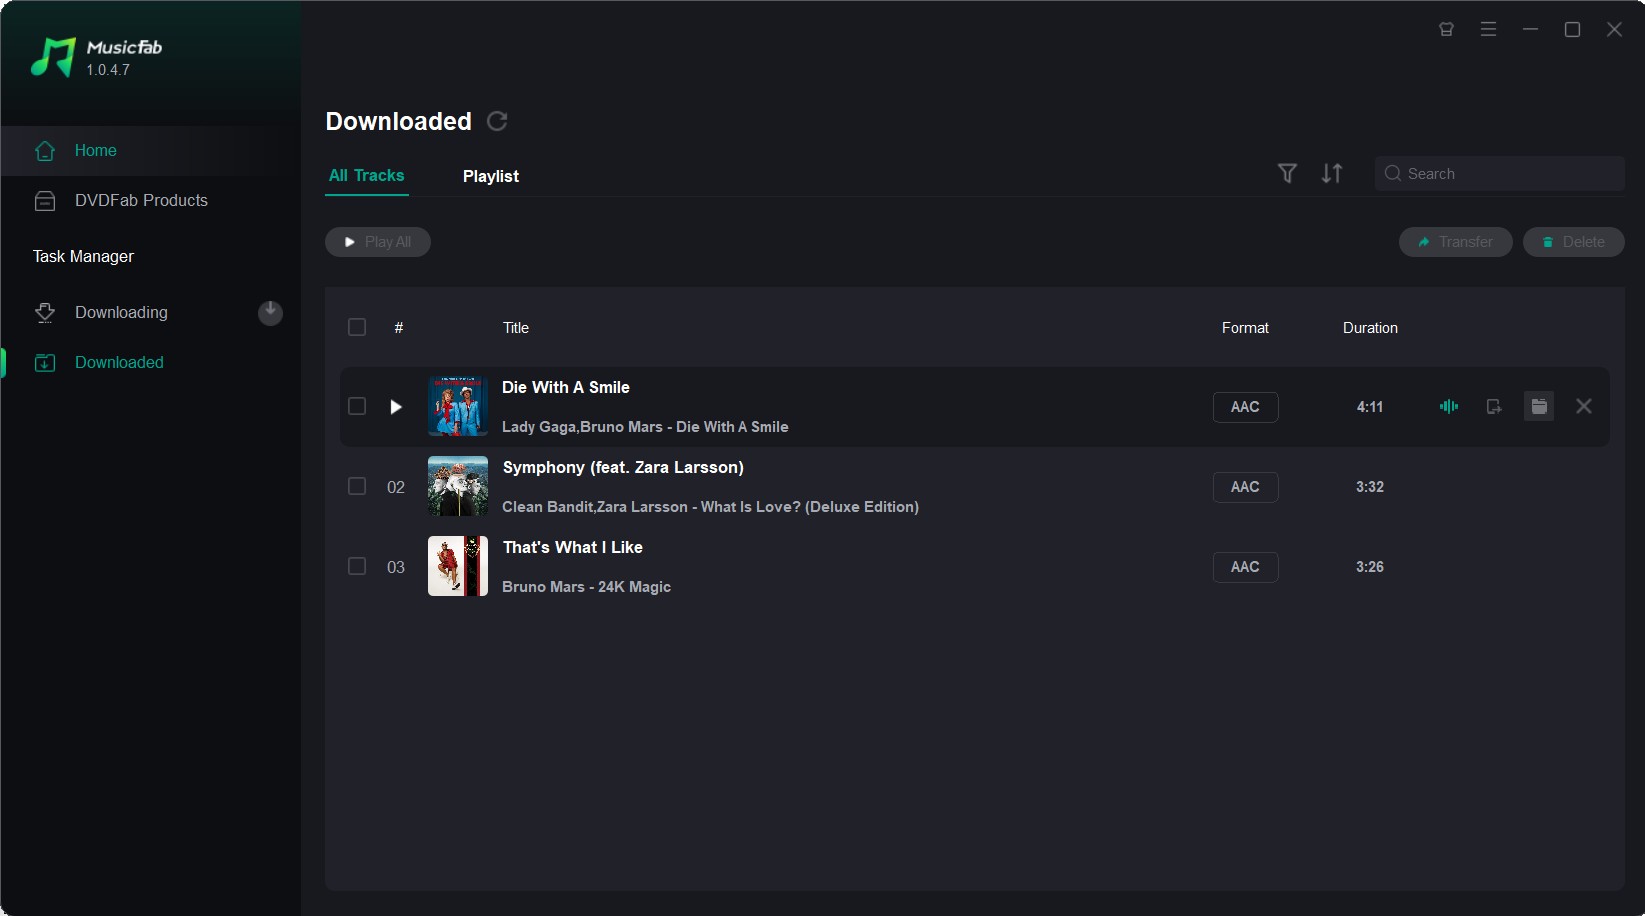
- Downloaded: You can access all your downloaded music from this section.
8. Download Non-Paid Online Music
MusicFab allows users to download music and from many services. The downloaded music files will be stored in many formats, like MP3, M4A, FLAC, OPUS, WAV and etc.
It is also very convenient to download music from MusicFab. Just click the website logo or name, take Spotify for example like below.
The inbuilt browser will open the website in a separate tab.
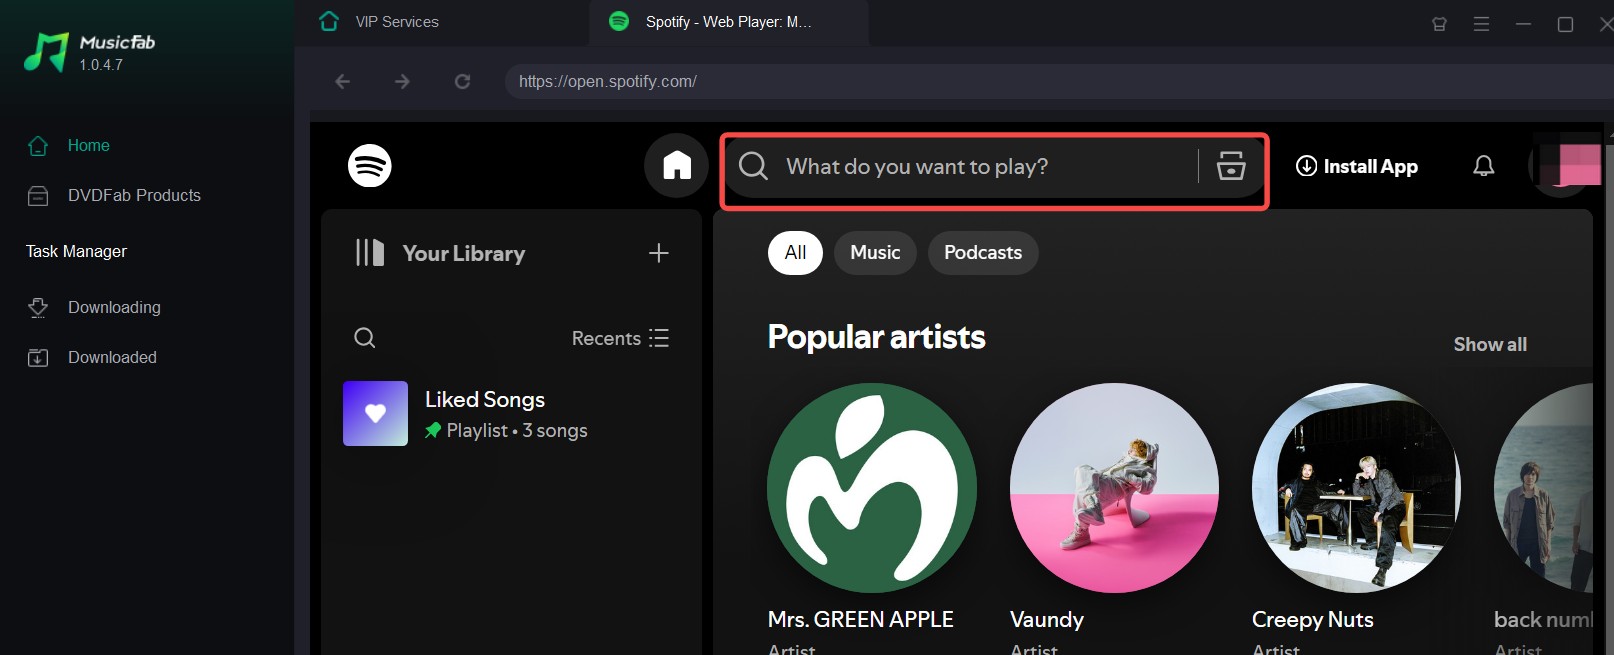
Then, search your target music by entering the keywords into the search box like you usually do on your own browser.
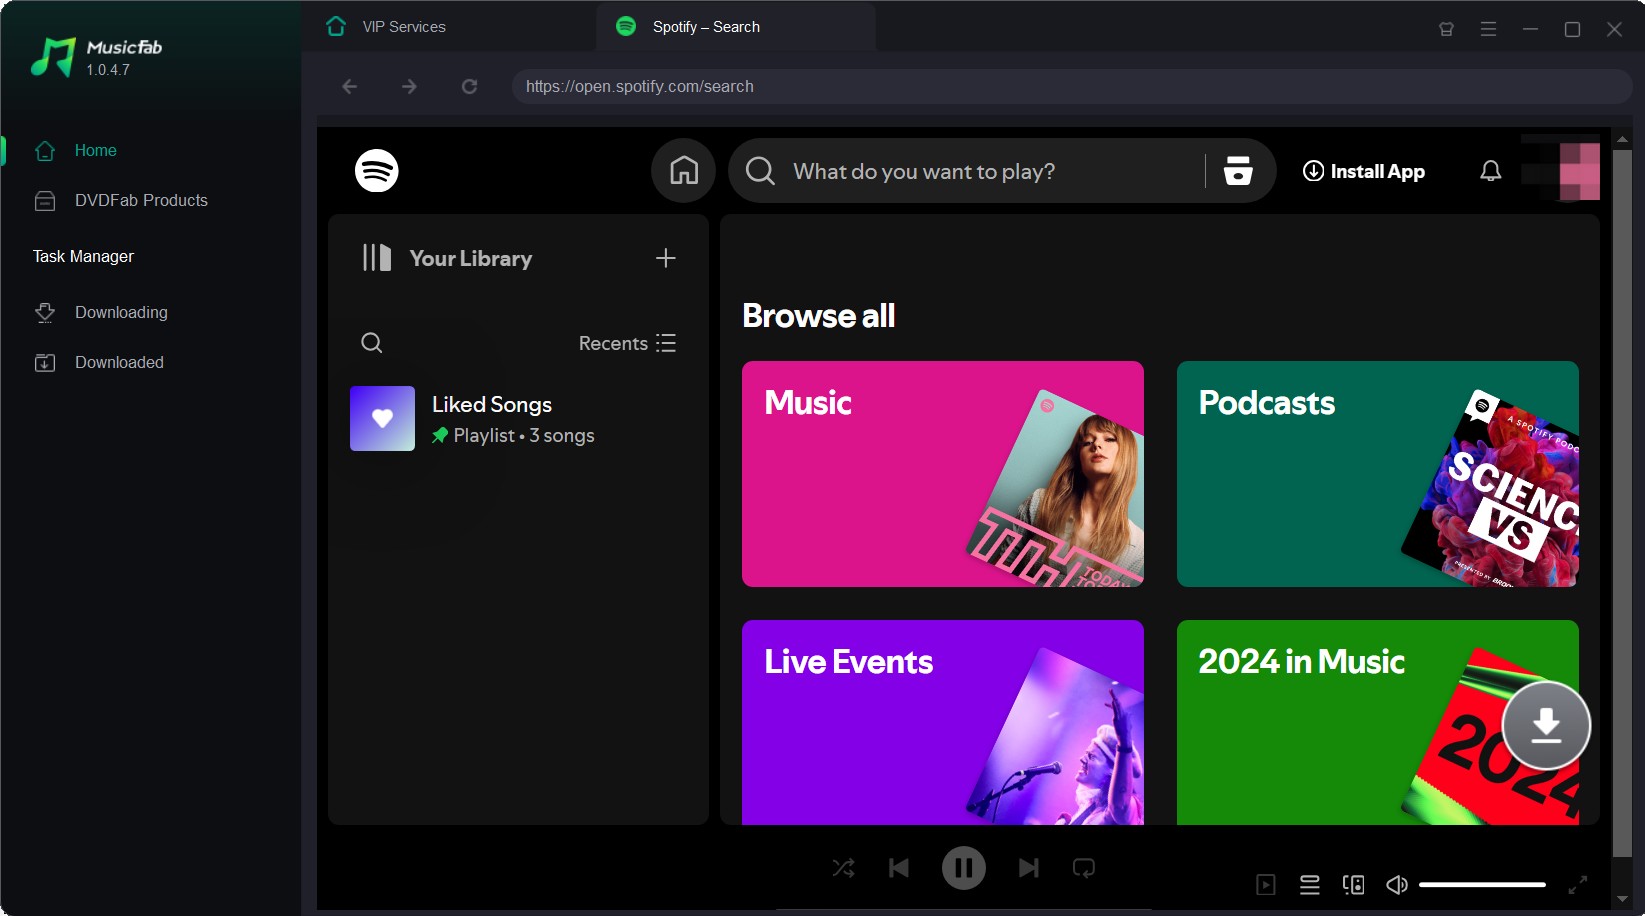
Next, from the search results, pick out the one and play it by directly clicking on its thumbnail picture. When the music starts to play back, then it will start to analyse the music.

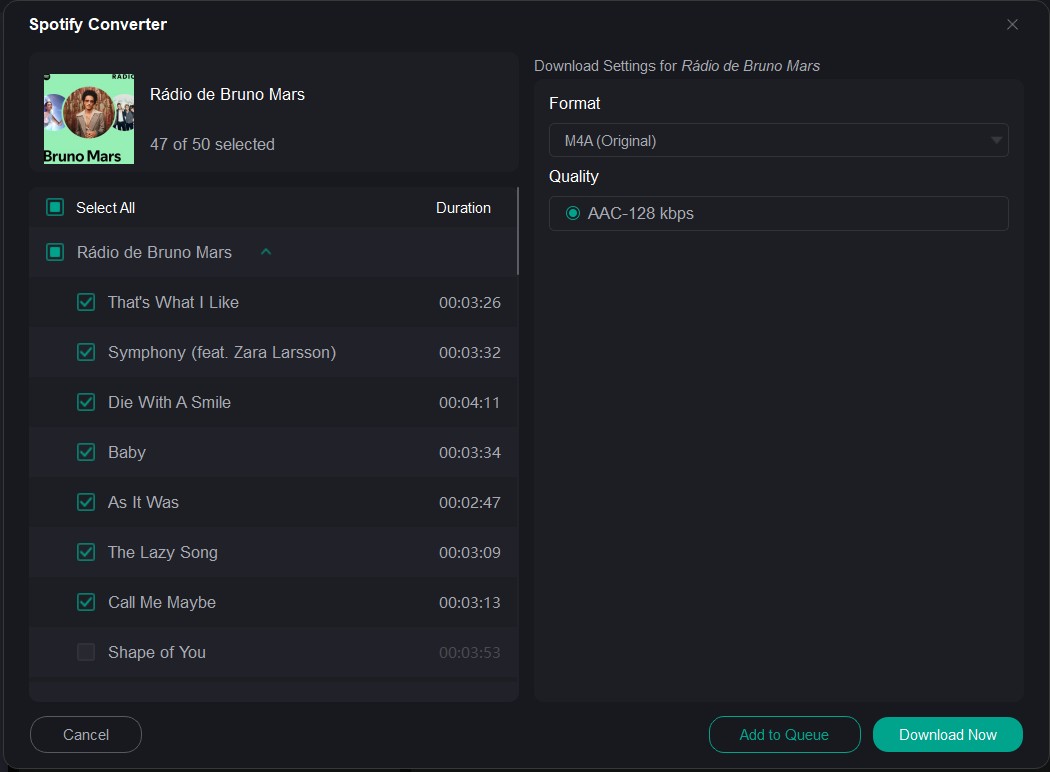
A window will pop up and ask you to select the Format and Quality of the music. After selected, click the Download Now button at the bottom of this window to start downloading the music.
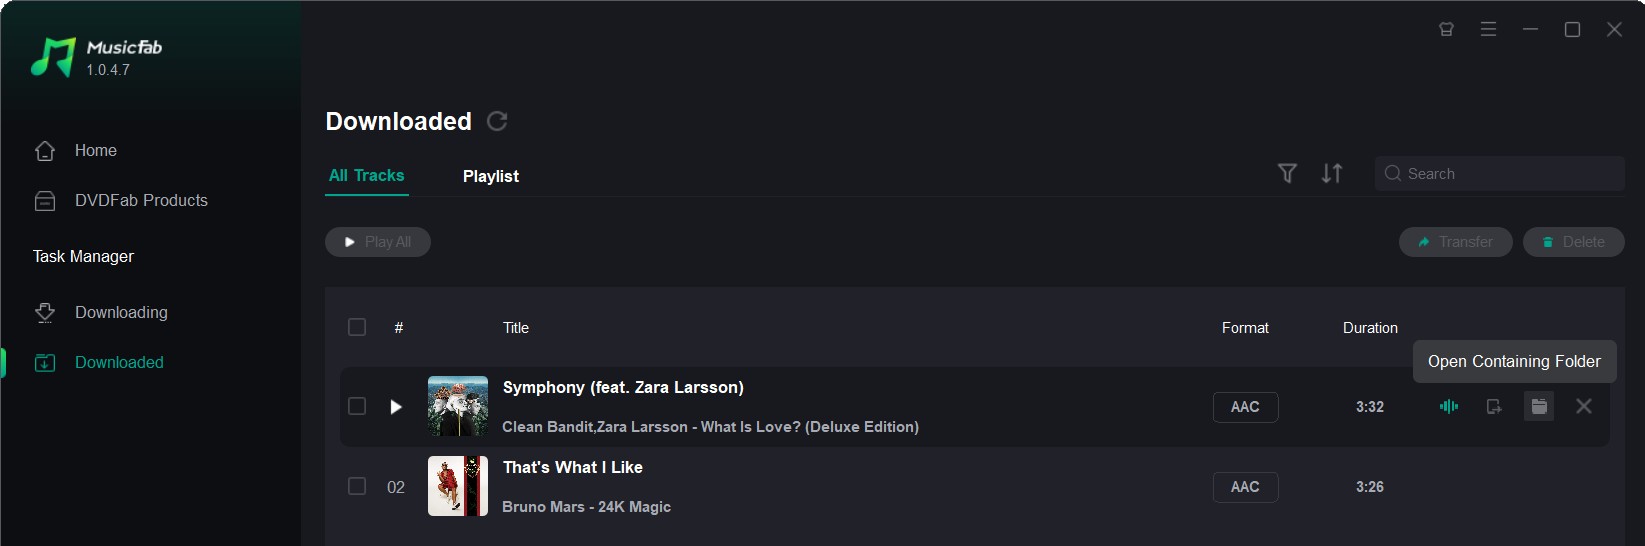
To check the real-time download progress, click the Downloading tab in the left navigation pane. When the download completes, you should be able locate the downloaded music in the Downloaded tab from the left pane, right-click on the music thumbnail and click the "Open Containing Folder" to locate the downloaded music.
9. Download On-Demand Streaming Contents
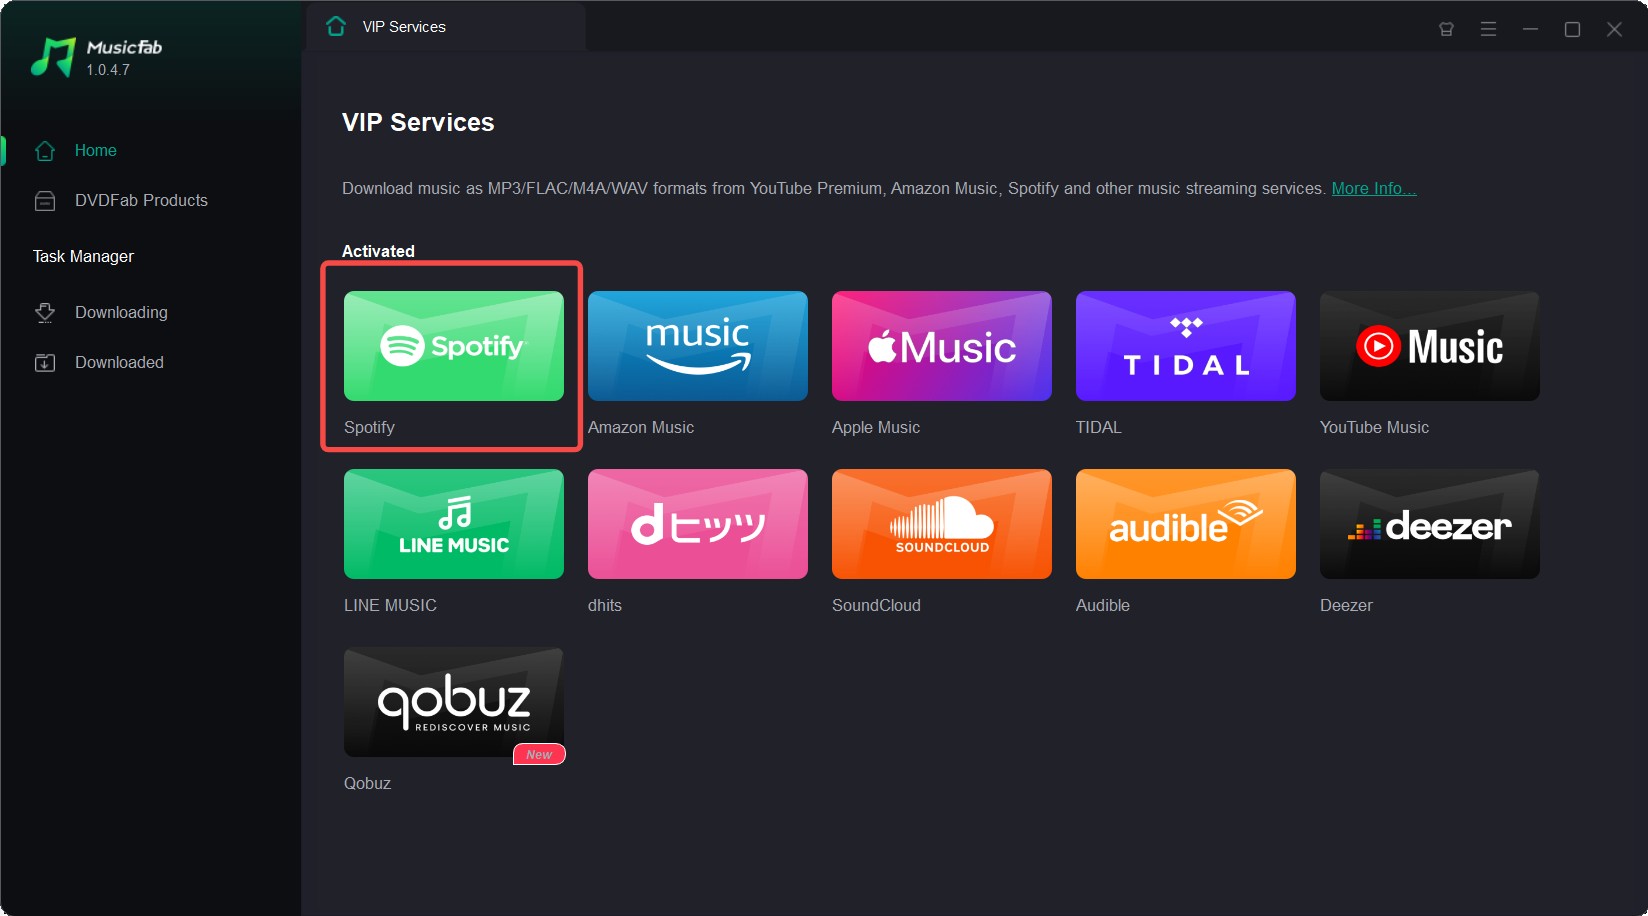
The VIP services allow you to download streaming music from Spotify, Amazon Music, YouTube Music, and 10 other platforms.
To use this feature, you need to navigate to the VIP Services section from the left Navigation Pane. There you can find the currently supported streaming platforms as of now.
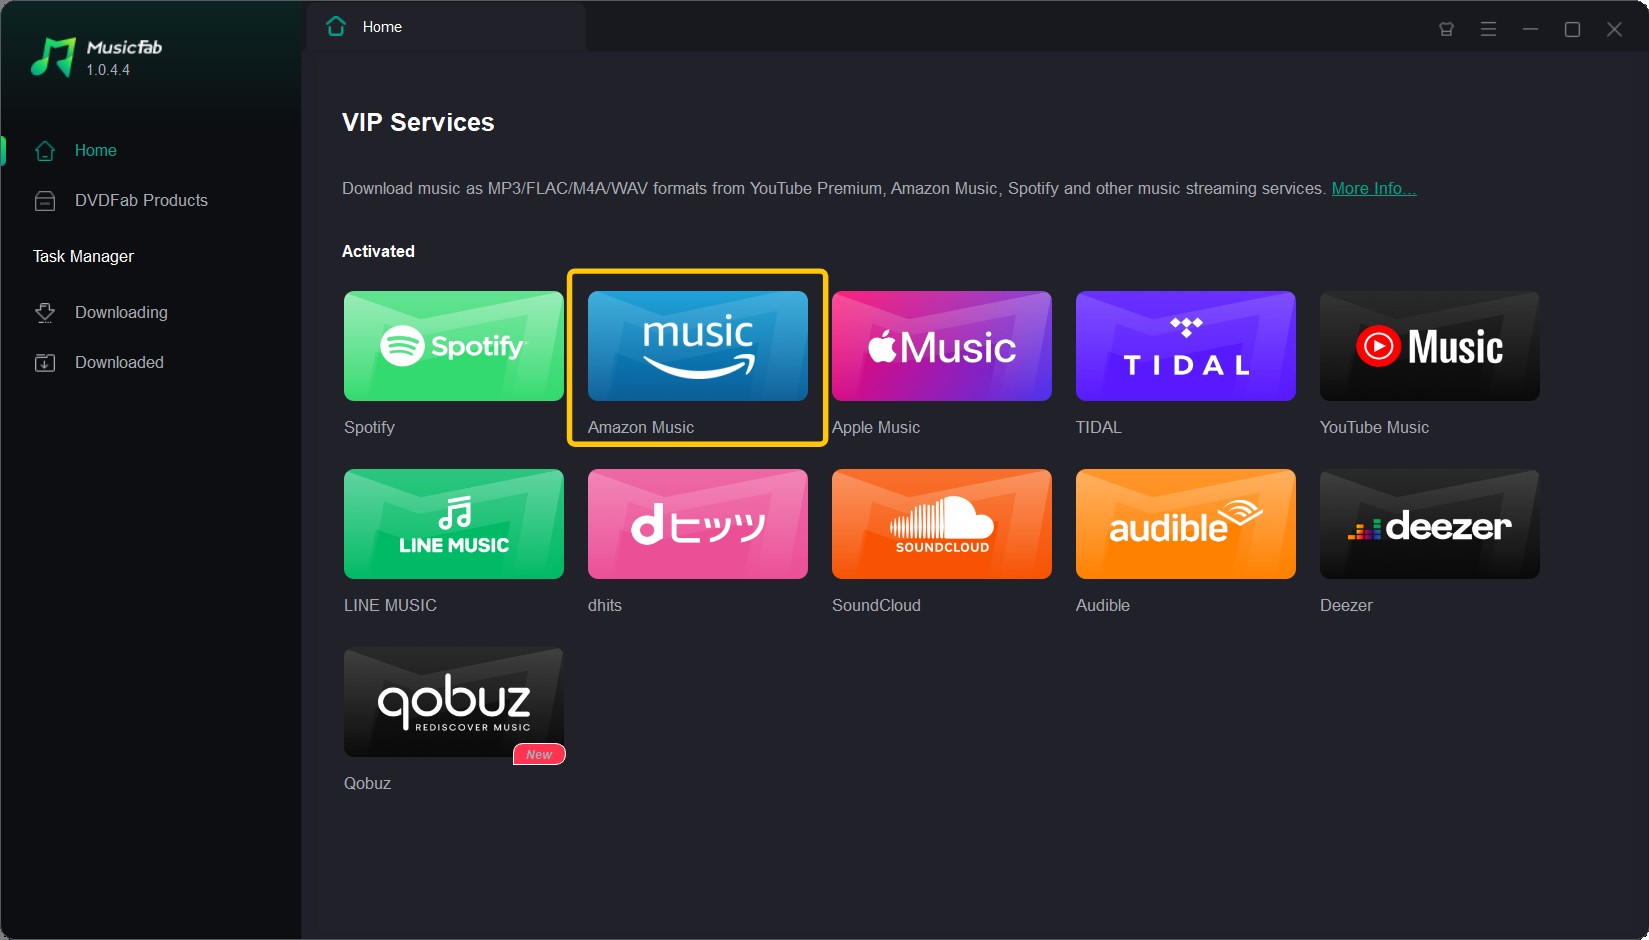
When you’re at the VIP Services, then you can click the website logo, Amazon or Spotify for example, from the supported website list that shall take you to the webpage with a separate tab with the inbuilt browser at the Homepage.
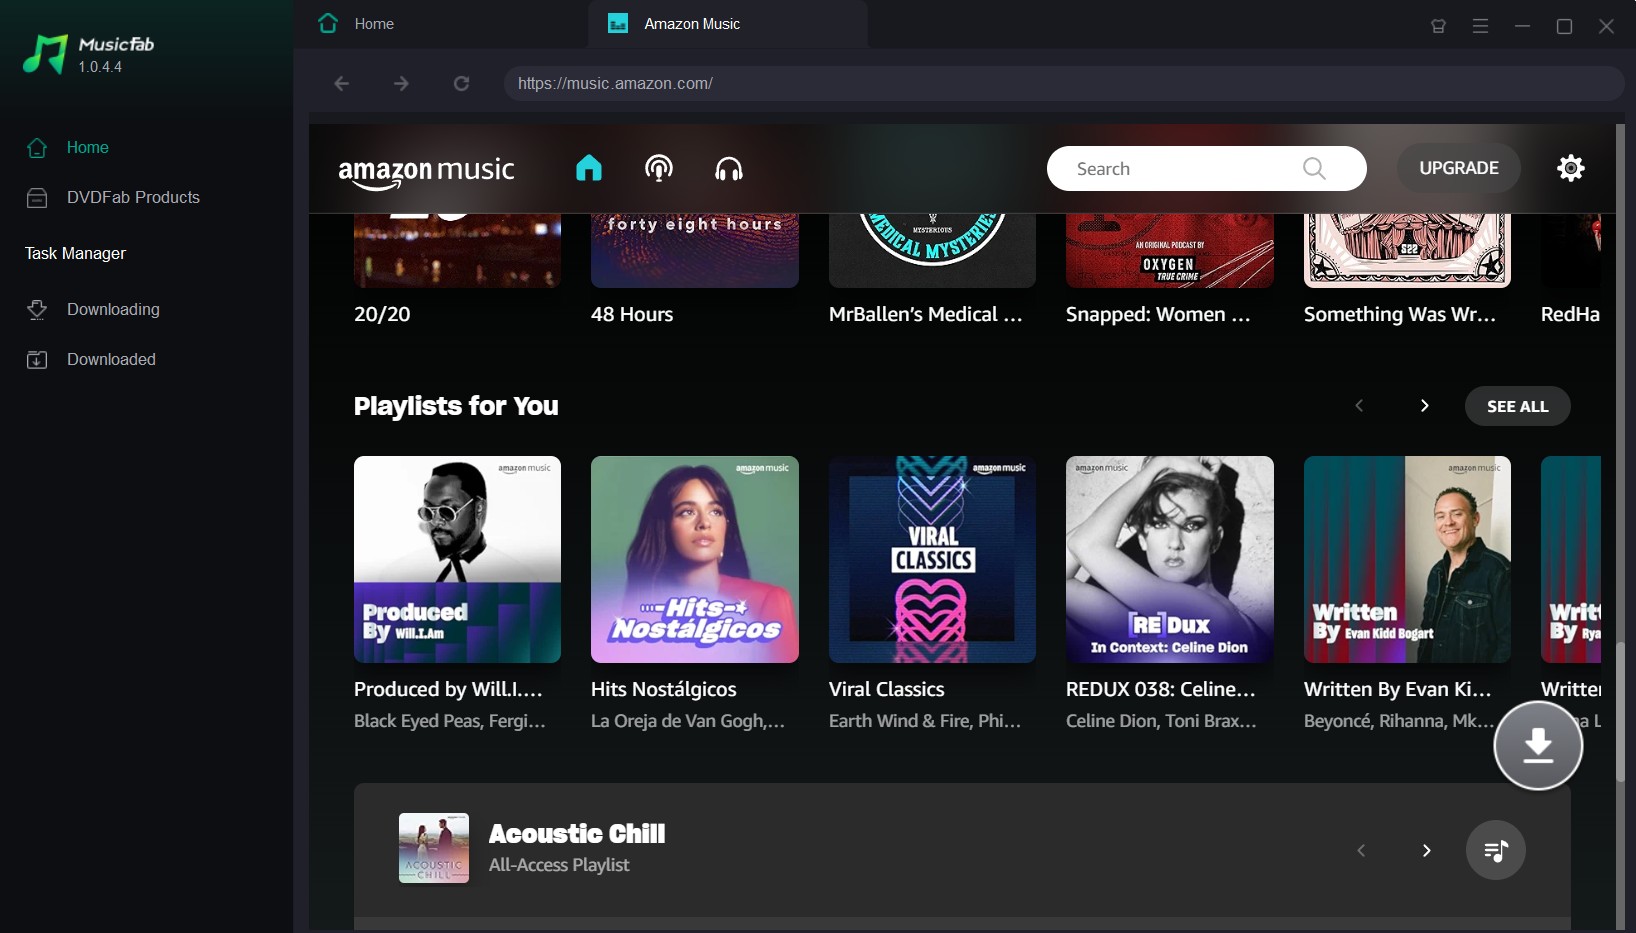
Log in with your Amazon account and then search the wanted title of your favorite music as you normally do. Next, you need to play back the music as usual. When the playback begins, a popup window will show up asking you whether you would like to Download Now or Add to Queue and manually start to download it at a later time.
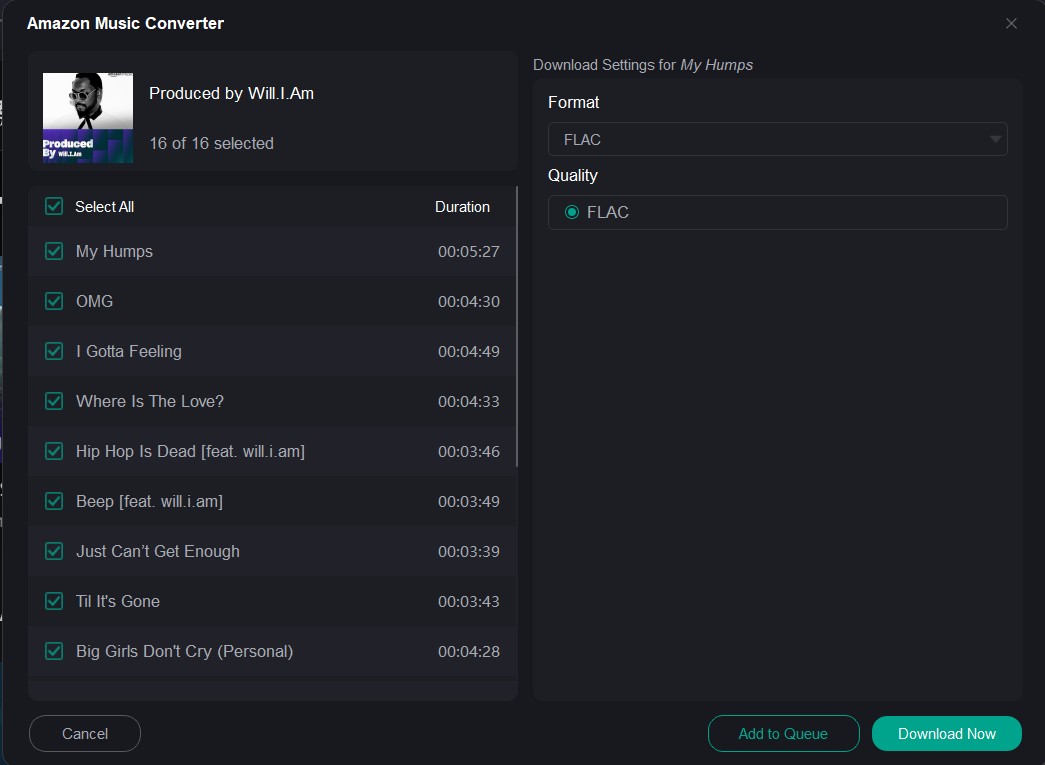
If you click the Download Now button, then the music will begin to download immediately under the Task Queue > Downloading tab. Here, you can monitor the download progress in a real-time manner, or Cancel the download anytime you want.
However, if you would rather add the music to the task queue for a while and manually start to download it later, then feel free to click the Add to Queue button. This is quite useful when you want to add more than one music to the download queue. You can put them in the queue and start the download later.
If you are going to download a playlist including multiple songs, then you can take advantage of the Batch-Download feature that allows you to add the entire album to download at one go.
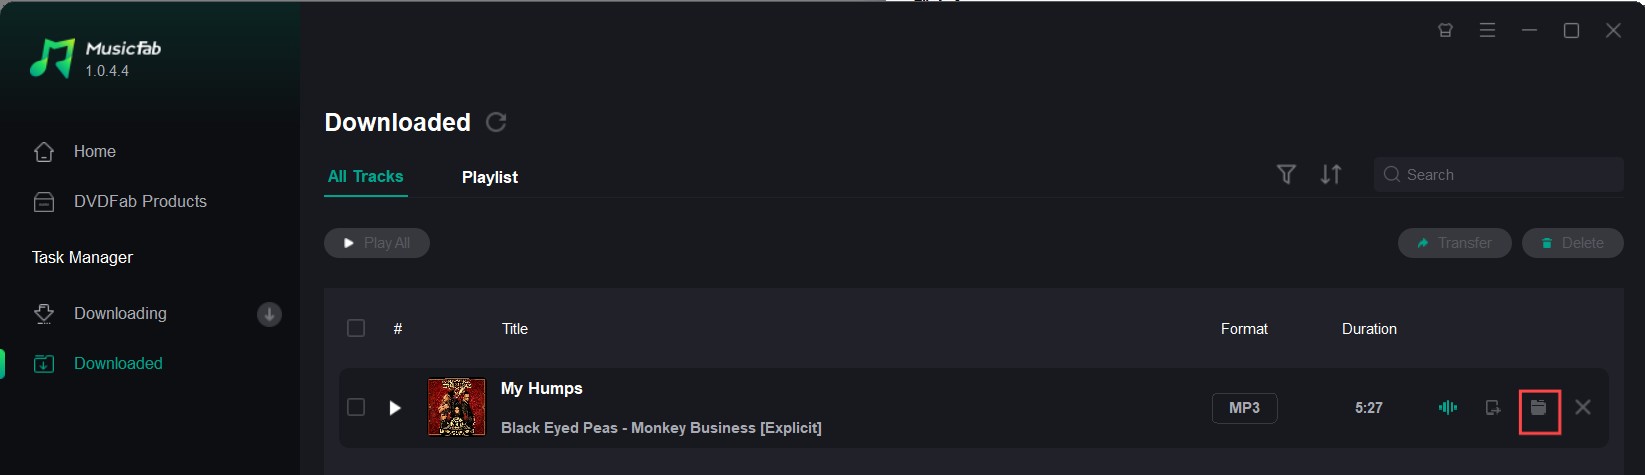
10. Manage and Play the Downloaded Media
MusicFab stores the downloaded media files in its default output directory, which can be reset per your own need at the Settings panel.

You can access the downloaded music files from the Downloaded tab under the Task Manager section. To locate the specific music, just click the "Open Containing Folder" to locate the downloaded music.
11. Update of This User Guide
As new updates and modules are constantly rolled out, this User Guide will also be updated in a timely manner to address any changes.